Log Cabin Tools for the Off Grid Sauna Bathhouse
Description
#logcabin #offgrid #building
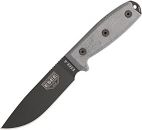
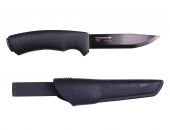
These are the hand tools I'm using to build the log cabin that will become the off grid sauna bathhouse on the Canadian wilderness homestead. I show and explain how I'm using axes, a slick, chisels, log carrier, draw knife, scraper, log gouge, handsaws and rip saws, measuring tape, chalk line, wood auger, brace and bit, log dog, adze, level and pulleys.
Awesome Axe made by craftsman Paul: http://www.torontoblacksmith.com
Awesome Knife made by craftsman Sam: https://www.virtusknives.com
Log OX : https://www.thelogox.com
Thanks for watching! New videos every FRIDAY. Please subscribe.
My Other Channel: Shawn James https://bit.ly/2xzZHpB
MERCHANDISE: https://teespring.com/stores/my-self-reliance
Watch the ENTIRE cabin and Forest Kitchen SERIES here:
HOW TO BUILD A LOG CABIN: https://bit.ly/2nbof06
SEASON 2 - The Interior: https://bit.ly/2CIjPqr
SEASON 3 - The Sauna/Bathhouse: https://bit.ly/2AskJWP
THE FOREST KITCHEN, Building It: https://bit.ly/2M3syZE
SEASON 2 - Outdoor Cooking: https://bit.ly/2CFgQPQ
To see what I’m up to during the rest of the week, please follow me on my other online channels;
Website: http://myselfreliance.com/
Facebook – https://www.facebook.com/MySelfReliance/
Instagram – https://www.instagram.com/myselfreliance/
My Mailing Address:
P.O. Box 20042
Barrie, Ontario
L4M 6E9
Canada
Links to gear used at the cabin:
Fjallraven Vidda Pro Pants - https://amzn.to/2rhEiMn
Tilley Endurables Airflo Hat - https://amzn.to/2Ia4xy1
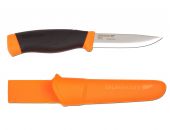
Mora Knife - http://amzn.to/2BOiv35
Agawa Canyon Boreal 21 Saw - http://amzn.to/2BPV6OF
Axe - http://www.torontoblacksmith.com/
Moka Pot - http://amzn.to/2DEomvO Canada http://amzn.to/2ndmtw6 USA
Virtus Knife- http://www.virtusknives.com/
Canon 6D - http://amzn.to/2EdaZjs
DJI Mavic Pro - http://amzn.to/2DHuJib
Solar LED light bulb 15W - http://amzn.to/2BQvSQ2
Copper Fairy lights - http://amzn.to/2BCmF0X
Solar String Lights - http://amzn.to/2DvgU2n
Lodge Dutch Oven - http://amzn.to/2kHuxDQ
Bragg’s Sprinkle - http://amzn.to/2EdouzK
Tags: Self Reliance,off grid,log cabin,homestead,diy,bushcraft,cabin,woodworking,woods,My Self Reliance,Shawn James,hand tools,axe,sauna,bathhouse,log cabin tools,tools,adze,log carrier,handsaw,wood auger,how to build a log cabin,log cabin build,off grid log cabin,off grid sauna,log cabin sauna,bathhouse build,sauna build,woodworking tools,log cabin building by hand,what's in my tool box

Video Transcription
[Music]
this might not be the best setup here but I've got all my tools assembled ready to go so I may as well do quick video on my tools for this log cabin I'll do it right here not sure how many of you care about this kind of stuff on a number of you are planning on building a cabin or have built a cabin or in the process of building one or if you're just a bush crafter and you like to build shelters and and survival type projects in the woods then you might find this helpful as well a lot of these tools are specific to log building but the majority of them are good for anything in the outdoors any kind of bush crafter would crop kind of stuff so none of this is endorsed I don't have any affiliations with any of these companies so I'm not getting paid to talk about any of this stuff however some of it was given to me and I'm trialing at trying some of this stuff on this project for the first time others I used on the last project or I've been using them for other things around here so feel free to support the the suppliers of the tools if you wish if not then don't feel like you have to because I am using them here so that being said I want to show you I guess I'll start read from the beginning about what I'm doing to get this ground prepared and then going up from the bottom so the first thing I had to do was decide whether I was doing columns or full foundation stone foundation which originally was thinking I might or to just go with a gravel sort of floating base the problem with the land here is that it's extremely rocky and extremely uneven so trying to dig a hole dug for holes actually in the first video of this series this log cabin season 3 series and I hit rocks right away I couldn't get down even 3 feet on all four of those holes even by moving around trying to square them up and kind of gave up no part of the problem is that the the frost goes extremely deep here especially if we get cold before we get snow I've seen it remember quite a while ago I was still working in the trade so back in the well in my 20s I guess got really cold winter with no snow and the frost went down seven feet so that's why we have to build our foundations here in Canada and in particular here down deep you have to get below that frost line because what happens is frost heaves melts and and expands and all that kind of stuff so it shifts everything so unless you get down that deep you're going to end up having shifting now that's a real issue in a building that's like brick or something where you have all these smaller components that can break apart as it moves with a log-cabin it's not as much of a concern hey Kelly what are you doing so the log cabins not as much of a concern be in this cabin because it's only ten by ten feet ten feet by ten feet which is roughly like three meters these are single logs were in the other cabin I had a joint in the middle so it was more prone to maybe flexing different so these being a solid log on all four sides means the whole thing might shift and it probably will but the whole building is likely to float and move together so what I ended up doing is putting down this maybe twelve inches of sand and gravel on another eight inches of this heavier crushed stone so the gravels going to do two things one it's going to allow water to percolate through right down to the ground before it freezes likely and the second thing is that it's going to allow well it's going to flow basically and spread the loads across on the ground which is going to continue to heave underneath it this being a sauna which is unique to this building rather than just a regular log cabin for a workshop woodshed or or residence is that this is a sauna with a shower and it basically or at least a bathing area
so I need the water to be able to percolate right through this and flush out so as far as building materials are concerned I have these logs I did use the Alaskan chainsaw mill to cut that one big love this foundation log in half so what I need to do is I needed to either embed that in the gravel or get it flat on the bottom so that the next course of logs sits on top when that's not it's going to sit down so the bottoms are all level all the way around
I tried splitting the logs or I did split the logs for the foundation on the on the cabin on the main cabin and cedar is very poor very hard to split straight first of all it's really soft and fiber so it just rips apart and it's twisted this one's not too bad it's a little bit straighter but found that I just couldn't split it properly so now I am ready to go the grounds level it's prepared I tamped it down as much as I could I have the two that's south log and North log I'll start calling it I guess I know know what set with west and east west is facing the cabin and their door kitchen and these two logs are the half logs I'm going to put three logs now across so on the East Side East Side West Side and also Center log so that I can have a center wall inside this cabin that's also going to have to carry the load of a joint in the ridge beams and purlins because I can't find a log well three I need two sill logs to intermediary logs and one at the ridge at the peak so I need five logs that are longer than the rest of these so that I get a no good overhang or have to put a joint in the middle I'm still looking and I'm gonna see if I can find it maybe I'll ask around the area see if anybody has some logs that are that long straight and that are also light enough that I can manage them on my own so I am building this cabin alone again and with hand tools so happy and said I'll tell you about the tools that I'm using here so the first thing I need to do so I've got these logs down now on the on the base so these three logs that are coming across I need to notch them create saddle notches that fit down now on top of these logs that are gonna carry them so what I need to do is scribe with this log scribe a few Kalli so this log scribe will show you how to use that in another video so if you tuned in to probably episode three of this hair is always hanging from my face with a beard this dog tuned in episode three or look for the trailer video for this this cabin log cabin series 3 or season 3 and I'll show you how I'm going to set this up exactly because if you don't just describe it how you would think just met by measurement you actually have to level this thing so which means I need to create a board that'll tact one of these trees it's level so I'll show you that like I said in another video now once I described that so I'm scribing the shape of that log so the saddle is sitting on on top of it to within about a quarter of an inch a few millimeters of the that line and then I'll finish it off with the log gouge I'll chop that out actually planned maybe I'll get to it tonight instead of using that Stanley sort of modern rips or crosscut saw want to use this on this project so this is old but I actually tried did a trial cut steel might be too rusted might be too pitted to get a good sharpened into edge on that but it did cut so I'm gonna try sharpening that tonight and I've ordered a tooth set so I can offset these teeth so you get enough of a kerf that it bites in all the way now if that works and that's my plan I'll cut down through your like every inch basically wide on that notch all the way down to with the very close to that line and then I'll knock that out with probably this hatchet nice new hatchet that Toronto blacksmith made for me last night I made this collar for it and he sent it along with this sheath nice little hatchet sort of like a carpenter's hatchet so I'm gonna come that handle up to make it a little bit more sticky but I'll be knocking the notch is it with that for the most part and then once I get within like I said a quarter of an inch or so of that line I'll be using this tool this is a log gouge and what it does is use it to gouge out the last bit of wood to make a nice smooth clean edge that's perfect perfect perfectly aligned with the line so that I can get it a nice tight fit down on that log underneath of it most of these logs are dry cut them last year and I ended up having to buy a few like I did for the last cabin as well well those were given to me but in this case I bought them from the same place that those ones came from and had to carry them back here which wasn't too bad because they're fairly late being cedar but majority on my cut or my friends property the last year so a year and a half ago
he's this big log had just pulled in from the back it came from that spot that was killed by fire or by lightning before I bought the property so whenever so it was nice and dry and not too bad for cracking back here but I did have to cut it back in the in the bush with the chainsaw mill because I could not carry the full log like that on my own I could have dragged it probably but with the knots and stuff on it was catching on everything so too much work so what am I going to use so I'm only going six feet high on the walls north and south walls and then I'll have a peak in the middle that's eight or nine feet high and I'll do a special fairly low sloped roof that I'll show you when I get to that point and these are probably an average of 6 inch diameter logs so that would mean 12 logs on the north and south walls and really on the east/west walls as well to get it up six feet so that's 48 and then I'll be filling in the gable so some full logs and then down to just a partial log as I get close to the peak and what else and then this Center wall it's another 12 so 60 70 70 70 to 80 logs to build this know you're worried about wood these trees are fast-growing they were all taken from either dead standing or from forests that need to be thin just like the last cabin just like the workshop all these logs were taken from forests that that you wouldn't even know I took any any trees out of there as you saw in in episode 1 of this series actually so that's it so though it's not just sit down tight for shaving whoops glue that handle back on got my draw knife here and what I'll be using that for is to shave the I guess flatten out the logs and also to take off knots and remove bark and stuff like that now also for straightening out the logs got this hewing axe and waiting to put this to good use on a bigger project like this this was also made by Toronto blacksmith actually I was down there and spent the day with them she want to check that video out put the link up here in the top of the screen here this looks like a massive chisel which I didn't know what it was either when I first started researching the tools I needed for the first cabin the one I built when I was in my early twenties I only used an axe and a bow saw and did sort of an improvised no it's that kind of collected water so this one's going this happens a lot better as far as construction is concerned and this one hopefully be even better because I'm more experienced now but when I did the research I found out this timber framing tool it's called a slick and it's basically a massive chisel and really it's best for square Timbers when you want to square up a nice tight mortise some square mortis or Tenon's even making square joints like that anyway the squares it off perfectly it's sharpened it this morning and it'll do a good job also of I'm using it to flatten out the logs as well once they're in place I find there's a high spot I'll take it off with that and maybe some of the other joints once I get to the finishing part of the cabin if you want to go back and see me using any of these tools go back to season one of the log cabin series and you'll see me especially working from the top of the walls up so on the gables in the second floor and then the roof line a lot of these tools I was able to show over there this is a called a log dog so what it does is you hammer that end into the log is going this way for example and the other one going this way hammer the other end into it and that'll hold it square while I'm marking my lines or if I'm working on a log with shaving it or cutting out that that saddle notch or something this holds it in place so it's not turning as I'm hammering on it so that's very handy I probably could use another one if we hand it up two of them especially as I get higher and I want to work up on the wall what else another little shaving knife a little more a thing actually usually use that for scraping scraping or doing some fine sort of woodworking I'll probably continue to use that for making the dowels along with the bigger draw knife so the part dowels are concerned reason I'm using dowels I don't want to use the metal spikes that I used on the last cabin on the main cabin this time so I have three of these things a fairly sharp and I have been using it you probably see me use it on other projects I'll sharpen that up again and oil it again and I've got two others smaller diameter that I'll use so reason I need the cabin room will stay together with just the saddle notches but because there's no notch on the bottom log to stop moving it can move a little bit and the whole thing can kind of shift around for smaller holes I'll I'll use this again this that brace got three of these things they're all old they don't work at 100% this is probably the best one and I'll use that like I have been on all the projects for drilling smaller holes and also for drilling in screws if I need screws for anything on the interior finishing work ya have this it's really it's a gutter adds probably it's the proper term for it because of that curve it's actually designed for cutting out or hollowing a log so into a gutter shape so all the way along you would hold that out so that it can hold water and I do plan on doing that actually on like to do that instead of metal on all three buildings we'll see if I'm capable of getting a decent enough gutter built but I would like to do that would gutters on this building the kitchen and the main cabin so I'll sharpen that thing ups not the greatest quality it came really blunt and I've had to sharpen it but I've also been using a little bit for knocking out the the saddle notches if I'm in a bit of a hurry or I'm feeling accurate enough that I can get it most of the way out with that tool so I'll probably do that again as well I always have a knife on my belt on here got this knife to virtus you tillis made by Sam in Saskatchewan Canada the company name is virtus knives he sent me that I know six months ago or something I've been using that for just about everything good solid knife that's a big blade on it so I can use a bit for chopping so if I want to cut a dowel or something and I'm too lazy to go get my axe and sharpening pencil and all that kind of stuff so that'll be on my belt the whole time a company that originally said Big Blue Ox but log ox anyway it's a cool tool you've seen it now in a couple of videos recently and it's a log carrier it's a PV for turning logs and it's picker rune so there's an attachment on the handle so you can pick up logs and drag them around and pick up firewood and stuff like that so pretty handy it's very very well built that's really heavy duty and I'm happy with it so far another thing is a timber jack so you just bite it in the PV hook into the log and then you kind of flip it over and it suspends the log in the air so that you can cut the end off there cut your firewood if your that's what you're doing with it very very handy for that you know when you're got a log lying on the ground and you're trying to cut it into bucket into firewood legs you don't want to go right through into the ground so you have to prop it up on something well this tool allows you to just hook on to it prop it up so like I said I'm not paid to say that or anything but he did send this to me and I appreciate that and I am enjoying it so far so I have to thank them first for sending that along yeah the log out comm big blue log ox at big blue logs is their Twitter and Instagram and stuff so anyway if you want to check that it's made in the US heavy duty like it so and at a level when a tape-measure typical things might use a string level I might use a probably use a chalk line once in a while to get a straight edge that I that I need to Hue straight or cut straight other than that that's pretty well lit you could actually get away with very little I could build most of this I would say probably with mainly an axe or those saws very handy but I could do most of it with an axe for sure and a pencil or and actually even a measuring just a string or something just to get equal measurements you don't even really need a tape measure or measuring tape or a ruler yeah you could basically build this thing with just a hatchet or an axe if you if you were so inclined this will make my life easier but not as easy if I just use power tools a chainsaw so I'm going to have a lot of fun with this project I'm really looking forward to getting this thing up because this will be the bath house with a change room in the front a fire I'll show you the fireplace in an upcoming video as well I ended up ordering sauna wood stove I looked at buying something or trying to make something but really it was most efficient to to just buy one because it was pretty cheap the guy makes it locally and I'm just going to encapsulate it and a bunch of rocks that I have at the property here and and use that so that firebox you'll feed it from in the change room which will be just inside the front door as you step in with a little bench or something there and then as you step through this door into the main sauna I'll have two benches two elevations like a typical sauna and then the firebox will be inside the fire actual fireplace wood stove with all the rocks and that's got a stainless water tank on the back of it so you can just dip in there to bathe with or although I might do a hand pump or a little electric battery powered pump or something to run to a showerhead because a subscriber sent me a really cool showerhead for my thing from Spain so I might use that as well and i will make a sink and I'm thinking maybe a hammered copper sink that I can use to shave and brush my teeth teeth added and stuff like that just all the stuff that I kind of do randomly through the properties including bathing and the lakes and the streams this time he's not very enjoyable and it's not fun sponge bathing outside when there's snow on the ground and it's minus 20 I usually do that in that brass bucket right there by the fire inside but this is going to be amazing to have so I'll heat this place up do everything in here and it clean properly so that's the point of this this building so hopefully you're interested in see me do this thing basic law cabman if you just want to see me or learn how to build a log cabin and then what i do inside will be of course make what makes it into a sauna so speaking of notches and all the healing and everything i'm doing these logs are too small to do what's called a full scribe log building which means i have to do what i did on the other cab and that's chink the joints put mortar between the logs in this spaces because these logs are too small diameter to square up or to do a full scribe where you ascribe the full lengths of the logs fit tightly together and you can either round those out so they sort of fit over top or square them up so they sit flat on top of each other there's not enough thickness in these logs they're only six inch average diameter so by the time i straighten them out they'd be down to two three four inches in some cases so it's just not practical to do full scribe unfortunately and you know it could have actually my friend who let me cut down a bunch of logs on his property some of them that i use for the thing the outdoor kitchen and that I'll use for the workshop they were big there was big trees there but i couldn't handle them in fact there's still some here that i can't really handle on my own i had to cut them down to eight feet to handle them so I needed twelve foot logs for this and finding this is about the maximum diameter is six seven inches anything bigger than that and I just can't carry them or or lift them into place where they would either help or power equipment so this will be just a regular saddle notch cabin with a mortar joint and not a full scribe so anyway that's it I am going to get to work here if I hope you're interested in watching this if you are it's called log cabin series episode or season 3 and I don't know how many episodes there will be because I don't know how long this is going to take me it's mid-october now and I'm hoping to get as much done before the snow flies to not be burdened with having to dig out my material everytime I'm working on this which will be every day or two so hopefully you will find this interesting and if you haven't subscribed already I'd appreciate if you could do that and make sure you hit that Bell the notification button so you get notified when a new video comes out I will be posting these at least every Friday and I often post also Monday and Wednesday on this channel and sometimes a random day throughout the week on my other channel as well so hope you enjoyed this one please let me know what you think love to hear from you love to read your comments and if you can hit the like button I really appreciate that too so take care and I'll see you up at the log cabin sauna next time take care [Music]
About the Author

My Self Reliance
Shawn James Canadian outdoorsman, photographer, guide and self-reliance educator. Writer for Ontario Tourism. myselfreliance.com Outdoor adventures, including survival, bushcraft, canoeing, kayaking, hiking, snowshoeing, fishing and camping.
More articles from this author
- Alone on McGarvey Lake, Algonquin Park - solo canoe trip
- Bannock Recipe and Cooking Methods
- Bonnechere Lake, Algonquin Park
- Hambone Lake Canoeing
- Homemade Hot Tent Tipi for Winter Camping by Camper Christina
- How I Keep Bears Away From My Food - With Help From My Dog
- Killarney OSA Lake Solo Camping and Canoeing
- Stuffed Trout: Trail Food Recipe
- Purslane: Noxious Weed or Superfood?
- My solo cooking kit - Budget Camping
- Portaging a Canoe - More Tips for Easing the Pain!
- Limbing with a Gransfors Forest Axe - Safety
- Canoe Fishing - Trolling setup
- Three Ways I Make Coffee in the Woods
- Catch and Cook Fish 9 Ways: Walleye, Lake Trout & Northern Pike
- Sunrise on OSA Lake
- Bear in Camp How Did the Ursack Perform?
- Screaming banshee on trail camera
- Heading Out on George Lake
- Kelly Kettle - Trekker model - Lunch on Provoking Lake
- Morning on Catfish Lake, Algonquin Park - May 9, 2016
- How to Pluck and Cook a Wild Duck Gourmet Style
- Camping, Canoeing and Cooking with Shawn James and Joe Robinet
- First Day of Spring 2016 Sunrise
- Rod and Gun Lake, Algonquin Park
- Spring Canoe Fishing Trip Delayed Until May 6th
- Fox Family Spring 2016
- Dexter cattle for grass fed beef.
- Killarney solo canoe fishing trip picture slideshow
- Last Paddle of 2015 - Solo Paddle Strokes
- Track and Tower Trail, Algonquin Park
- Sunrise on the French River
- Solo Bushcraft Camp in Cold November Rain
- How to Duck Hunt Out of a Canoe
- My Self Reliance - Bushcraft, Canoeing, Hunting, Fishing and Homesteading
- How To Make Pine Tar and Charcoal From Fatwood
- Pog Lake, Algonquin Provincial Park - My favourite campground
- Calling and Tracking Moose During the Rut
- Swift Keewaydin 14 on Georgian Bay
- Installing a Privy at the Log Cabin
- Sweet and Savoury Bannock Cooked on a Campfire
- Build a Permanent Adirondack Shelter in 2 Days
- Kingfisher Lake, Algonquin Park - solo canoe trip
- Paddling Honey Harbour and Beausoleil Island, Georgian Bay
- Winter Bushcraft Camp & Snow Shelter with Shawn James & Joe Robinet
- Lawrence Lake, Algonquin Provincial Park
- The Hand-tools I Am Using to Build My Log Cabin and Choosing the Cabin Site
- Algonquin Park Solo Camping Trip Canoe, Burnt Island, Bear Lakes
- Fire, Fishing and Foraging
- Playing in the Waves with my Keewaydin 14 Canoe
- Bat Lake Hiking Trail, Algonquin Park - Winter Hiking
- Dressing for Late Season Cold Weather Deer Hunting
- The Paddles That I Use for Solo Canoeing
- Tim River falls at the Queer Lake portage, Algonquin Park
- Harness Lake, Algonquin Provincial Park
- Lemon Lake, Algonquin Park
- Canoe Camping in Canada in Autumn with Joe Robinet
- Campfire and Sunset on Burnt Island Lake
- Algonquin Park Longbow Lake - Solo Canoe Trip
- Shawn James and Joe Robinet Interview: Bushcraft and Winter Camping
- Traditional Canoe Camping on the North Channel of the French River
- What's in My Day Pack? My Solo Day-Tripping Gear
- Winter Camping and Bushcraft - Lake Water
- Log Cabin Build: Free and Cheap Materials
- Fishing the Oxtongue River in Algonquin Park
- Build a Cheap Log Cabin from the Ground Up
- Hunting, Fishing, Canoeing and Bushcraft with Shawn James, Joe Robinet, Doug Outside and Scrambled O
- Hiking the Kolapore Uplands - Metcalfe Crevice - wow, cool caves
- Paddling on the French River
- How to Build an Off Grid Log Cabin: For FREE!
- Kayaking Georgian Bay - Giant's Tomb
- Temporary Sleep System for Cold Weather Camping
- Smoke Lake - Bonnechere Lake - Cache Lake Loop: Algonquin Park Canoe Routes
- The Log Cabin: Clearing the Site and Preparing the Foundation Logs
- North Grace Lake, Algonquin Provincial Park
- Solo Camping on OSA Lake, Killarney Provincial Park
- Silver Peak, Killarney Provincial Park - Winter Ascent
- Homesteading: Farm to Table Poultry
- My Backcountry Canoe Fishing Rods
- Sunset on Smoke Lake, Algonquin Park
- Georgian Bay Camping and Sunset On Philip Edward Island
- Log Cabin Build: You Can Do This Too
- My Single-carry Portage System for Canoe Trips
- Algonquin PP May 2015 Canoe Trip Longer version
- Primitive Log Cabin in the Forest Alone in the Wilderness with Hand Tools
- Cabin Cookout: Breakfast Frittata
- Whiskey Jack Lake, Algonquin Park
- Cradle Lake, Algonquin Park - Clear blue water!
- Peanut Butter Energy Balls
- Build a Log Cabin with Fence Posts In My Backyard
- Couple's Ice Fishing in Northeastern Ontario
- An Evening Paddle in Collins Inlet, Georgian Bay
- Howling Wolves Wake Me Up at the Cabin
- Winter Bivy and Bushcraft Camp - How to Build a Winter Campfire
- Killarney Solo Canoe Trip Part 3 - The Bear
- Drilling a Lanyard Hole in a Ferro Rod
- Algonquin 2016 Solo Canoe Trip Day 5: Burntroot to Misty
- Cache Lake, Algonquin Provincial Park
- Kayaking Parry Sound Harbour Great beach campsites on Parry Island
- Lake Loiusa, Algonquin Park - Fishing destination
- Hiking Inglis Falls Conservation Area - Must return!
- Beaver on OSA Lake
- The French River - Parisien Island to Loon's Landing
- Algonquin Park Backcountry Canoe Fishing Tackle Box
- Meet My New Adventure Dog, Cali the Golden Retriever
- Log Cabin Update: Moving it to the Property, Making a Log Bench and Fireside Chat
- Cutting Down Huge Dead Trees at My Self Reliance Camp
- Cabin Cookout Sausage, Eggs and Steak Melt Sandwich
- Chaga Mushroom for Tea and Tinder
- South Canisbay Lake, Algonquin Park
- Channel Update and Wood Carving Tool Introduction
- Camping in Algonquin Park Little Trout Lake Solo Canoe Trip
- Algonquin Spring 2016 Canoe Trip Day 2: Grassy Bay to Catfish Lake?
- Misty Morning on Burnt Island
- Mohawk and Little Mohawk Lakes, Algonquin Park
- Killarney Late Season Hot Tent Canoe Trip - Rare experience!
- Close Encounter with a Mother Black Bear and Her Cubs
- Delano Lake, Algonquin Provincial Park - solo canoe trip
- Small Rivers and the Solo Canoe
- Killarney Solo Canoe Trip: Fantastic Fishing
- Campfire Deer Ribs, Grouse Hunting and Scouting For a Winter Campsite
- Ontario Fishing and Hunting Trip Trailer - Survival & Self Reliance Discussion
- Little Coon Lake, Algonquin Park - Solo canoe trip
- Make a Tripod Hoist and Move Logs While Building a Cabin Alone
- Bowhunting and Recipes for Deer
- Lost! My Gear for Surviving an Emergency Overnight Camp
- The French River - Camping on the South Channel
- Cooking Grouse on a Campfire
- COMING SEPTEMBER 2ND: No Permit Required: How to Buy Property For Your Log Cabin or Tiny Home
- Killarney Solo Canoe Trip June Part 2: Deer!
- Algonquin Park Solo 6 Day Canoe Fishing Trip May 2015
- My Canoe Camping Gear and Food for a 1-Night Canoe Camping Trip
- Plough Lake, Algonquin Park
- Head Lake & Head Creek, Algonquin Provincial Park
- Shawn James and Joe Robinet: Late October Camping Trip
- Hiking and "bushcraft" in the McCrae Lake Conservation Reserve
- Living off the Land at the Log Cabin
- Trailer for my Algonquin Park Spring Solo Canoe Fishing Trip 2016
- Grundy Lake Bear Cubs - Daytime visit
- First Paddle of 2016
- Log Cabin Building: Do I Plant Trees to Replace the Trees I Cut Down?
- Algonquin 2016 Solo Canoe Trip Day 4: Catfish to Burntroot
- Solo Winter Cold Camping and Bushcraft in Muskoka Ontario - My Self Reliance
- Cabin Cookout: Baked Beans on the Fire
- Sentimental on Pardee Lake, Algonquin Park - Nice campsite!
- Solo Winter Cold Camp and Bushcraft - Ramona Lake, Western Uplands Trail, Algonquin Park
- Algonquin 2016 Solo Canoe Trip Day 6: Misty Lake to Magnetawan Lake
- Whatnot Lake, Algonquin Park
- Bull moose in rut, Algonquin Park
- Shawn James and the Wooded Beardsman on Camping and The Wilderness Survival Challenge
- Breakfast on Remona Lake, Algonquin Park
- Algonquin Park Solo Canoe Trip Day 3: Burntroot to Catfish Lake
- Camping on an Island in Georgian Bay, Canada
- Algonquin Park Solo Canoe Trip Day 1: Magnetawan to Grassy Bay
- Coldwater River: Maiden Voyage - Swift Keewaydin 14 - Spring!
- Hilliard Lake, Algonquin Provincial Park
- No Permit Required! How to Buy Land for Your Log Cabin or Tiny Home
- Winter Camping with Tierney Angus: Bacon, Donuts, Mukluks, Toboggans and Hot Tent Tips
- Winter Camping: The Problem with My Latest Winter Campsite
- First Test Video With My New Canon EOS 80D DSLR Camera
- My Solo Winter Camping Gear
- Interview with Red Lake Outfitters: Woodland Caribou Provincial Park
- Solo Canoeing & Fly Casting Practice - Trip Preparation
- A Perfect Spring Day - Canoeing, Wildlife and Gear Prep
- Trout Fishing Gear for July Canoe Trip
- Notching & Splitting Logs, Cabin 2 and I Get Philosophical
- Pardee Lake, Algonquin Provincial Park - Fantastic!
- Canoeing & Kayaking the McCrae Lake Conservation Reserve
- 8 Day Fishing Trip in the Thunder Bay Region of the Canadian Wilderness
- Tim River, Algonquin Provincial Park - One of my favourites!
- Robinson Lake, Algonquin Provincial Park
- Silver Peak Winter Camping - Killarney
- Who is Shawn James and What is MySelfReliance.com?
- The Art of Shou Sugi Ban - How to Preserve Wood with Fire
- Point Grondine Park
- Log Cabin Construction: Log Gable Ends, Center Column and Ridge Pole
- How I Designed the Cabin and Positioned it in the Forest
- Living with a Blackbear at the Cabin in the Forest and Installing Windows
- Off Grid Cabin in the Forest: Raising the Roof and the Power of Inertia
- Fire Hardened Wood Roof on a Log Cabin in the Woods using Ancient Japanese technique Shou Sugi Ban
- Off Grid Cabin in the Forest - Eliminating debt and trimming loose ends
- Winter is Coming! Can I Finish the Log Cabin in Time? Roof, Stove and Outhouse
- The Man with the Axe: Archery, Cast Iron Cooking, Splitting Axe Review and Respect for Women
- Building a Log Cabin in the Forest with Help From My Dog - Roof, Stone Floor and Woodstove
- Building a Rustic Log Cabin: Wood Plank Flooring and the Cost of Early Retirement
- Insecurity at the Off Grid Cabin - Doors, Firewood and an Outhouse
- 6 Essential Tools for Building a Log Cabin: Don't Waste Your Money on This
- Books: The Craft of Log Cabin Building and One Man's Wilderness, Dick Proenneke
- Off Grid Cabin: A Visitor, a New Door and Wood Floor
- My Self Reflections: My 3 Month Rule for Managing Relationships
- Build a Log Cabin: Front Porch, Self Reliance and Survival, Generation Z
- Forging a Hewing Broad Axe with Shawn James and Toronto Blacksmith's Paul Krzyszkowski
- Building a Rustic Table for the Off Grid Log Cabin with Materials From the Forest
- TORNADO WARNING: Camping and Canoeing in Severe Weather in the Canadian Wilderness, RAW FOOTAGE
- Dressing for Extreme Cold Winter Weather at the Off Grid Cabin
- FREE Coffee Replacement From the Forest
- Man Builds Off Grid Log Cabin Alone in the Canadian Wilderness
- Giant Cheese Burger, Debt Free Living, Becoming More Self Reliant and Successful at the Log Cabin
- Log Cabin - Leatherbound Door and The Hole in the Floor?!
- Cooking at the Cabin: Cheese Fondue and Birthday Hike with My Wife and Dog
- Bushcraft Log Cabin Project, Cast Iron Cooking and I'm a Ramblin' Man
- Log Cabin TIMELAPSE Built By ONE MAN In The Forest (Real Life Minecraft)
- Golden Retriever vs Snake - Snake Strike, Funny Video
- Log Cabin: Primitive Clay Daub and Wood Fired Cast Iron Pizza
- Cooking Barbecue Venison and French Fries at the Log Cabin Outdoor Kitchen
- Off Grid Log Cabin: Alone with my Dog in an Ice Storm
- OFF GRID LOG CABIN with My WIFE and DOG, Catch and Cook TROUT
- How to Heat an Off Grid Log Cabin with Wood, Thermal Imaging Scan (infrared)
- The PERFECT BURGER on The Forest Kitchen Barbecue (BBQ) Grill
- Cabin Life Below Zero: Winter Camping and Ice Fishing
- Q&A: How Does the Eco Fan on My Woodstove Work?
- Off Grid Cabin Life with My Dog: Rustic Kitchen for the Wilderness Homestead
- OFF GRID WATER at the LOG CABIN
- Traditional Woodworking using Hand Tools: Finishing Interior of an Off Grid Log Cabin DIY Kitchen
- Making Cedar Shakes for The Forest Kitchen Roof at the Off Grid Log Cabin
- Off Grid Log Cabin in the Forest: DIY Rustic Wood Kitchen, Handmade Copper Sink
- How to Make & Install Floating Shelves in a Tiny House Rustic Kitchen, DIY Log Cabin, Macaroni
- Homestead Food, Hot Weather and Happy 4TH of JULY
- Mortise & Tenon Sawhorses at the Log Cabin, Is This Really Off Grid Living?
- Bushcraft: Carving a Wooden Spoon and a Hooked Knife Handle at the Log Cabin
- Chimney Cleaning and Stone Hearth at the Log Cabin
- Long Term Food Storage for Self Reliance at the Off Grid Log Cabin
- Venison Poutine at the Off Grid Log Cabin, The Simple Life
- Felling a Huge Maple Tree with an Axe, Milling Lumber with Granberg Alaskan Chainsaw Mill, Husqvarna
- Home Alone with my Dog at the Log Cabin, ASMR Tapping Trees, Off Grid Refrigeration
- Tiny House Furniture, Gratitude, Perspective and Perseverance, Log Cabin Life, Braised Lamb Shanks
- Log Cabin Wilderness Homestead, Maple Syrup, Wild Edibles, Primitive Skills
- Off Grid Log Cabin in the Forest with my Golden Retriever Cali
- Bushcraft Knife and Axe Safety, Working Safely Alone in the Forest, Log Cabin Life
- Cordwood Kitchen Floor | Outdoor Kitchen | Off Grid Log Cabin
- Fireplace Transformation, Cast Iron Cooking | Wilderness Survival Shelter
- Solar Power Update | Dealing with Loneliness
- NOT Alone with My Dog at the Log Cabin, Wild Edibles, Wild Life, Hugelkultur
- The Fall | Have You Seen the Ugly Orange Chairs Yet?
- Wolves, Drought and Failed Raspberry Crop
- The Building Site for the Log Cabin Bathhouse | Wilderness Sauna
- FREE Hardwood Floor for the Outdoor Kitchen | Off Grid Log Cabin | Forest Kitchen
- Testing the Clay Oven | The Forest Kitchen | Earthen Oven
- Raising the Roof | The Forest Kitchen | Off Grid Log Cabin Build, Ep.3 S1
- Cordwood Bear Claw, Homemade Cheese | The Forest Kitchen | Off Grid Log Cabin Build, Ep.8 S1
- November Rain | Log Cabin Sauna Ep 7 | Canadian Wilderness Off Grid Living
- The Log Cabin in the Forest Gets a Facelift, Cottage Life
- Cali's New Winter Dog Boots for Snow and Ice
- Cooking Outdoors at the Off Grid Log Cabin: Steak and Fries on the Campfire
- Table Made of Mud | The Forest Kitchen | Off Grid Log Cabin Build, Ep.9 S1
- DIY Stone BBQ Timelapse | Outdoor Kitchen
- Wooden Roof Shelter | The FOREST KITCHEN | Off Grid Log Cabin Build | Ep.11 S1
- Timelapse Timber Frame by One Man in the Wilderness
- I GOT HURT Building a PRIMITIVE KITCHEN in the Forest
- My Wild Life at the Log Cabin
- Barbecue (BBQ) Ham and Eggs | The Forest Kitchen | Off Grid Log Cabin Build, Ep.6 S1
- Snowed Out at the Log Cabin in the Canadian Wilderness
- Solar Electricity for the Off Grid Log Cabin with Goal Zero Yeti Power Station
- Rock and Roll Barbecue BBQ | The Forest Kitchen | Off Grid Log Cabin Build, Ep.5 S1
- Clay Pizza Oven Foundation | The Forest Kitchen | Off Grid Log Cabin Build, Ep.7 S1
- DIY Rocket Stove, Outdoor Kitchen, Golden Hour Life Hacks
- Off Grid Outdoor Kitchen at the Log Cabin, Why Build It?
- Lyme Disease, Tick, Mosquito and Fly Defence, Permethrin Clothing Treatment
- Wildlife at the Log Cabin, Off Grid Security
- Primitive Clay Mud Oven | The Forest Kitchen | Off Grid Log Cabin Build, Ep.10 S1
- Small Town Life: Learn to Fish, Hunt and Bushcraft, Shawn James Childhood
- Traditional Woodworking in the Forest with My Dog, Cali the Golden Retriever
- My Top 3 Axes for Bushcraft and Building a Log Cabin
- DIY Cedar Shingle Roof | Off Grid Log Cabin | The Forest Kitchen
- Timber Frame | The Forest Kitchen | Off Grid Log Cabin Build, Ep.1 S1
- Build a Stone Hearth for the Off Grid Log Cabin with My Dog | Woodstove Maintenance
- Q&A: Why I Wear Wide-Brimmed Hats
- Working Solo | The Forest Kitchen | Off Grid Log Cabin Build, Ep.2 S1
- She Digs It | The Forest Kitchen | Off Grid Log Cabin Build, Ep.4 S1
- I Have a Question for You
- The BEST Week of the Year!!! (at the Log Cabin)
- Winter is Coming! | Log Cabin Life
- Cooking Dinner With My Wife in the Forest Kitchen | Partridge | Blueberry Pie dessert
- Bushcraft Super Shelter Style Wood Shed | Deer Meat for Dinner BBQ
- Charred Wood Foundation | Shou Sugi Ban | Log Cabin Sauna Ep 5
- Wild Mushroom Pasta and Bone Marrow in The Forest Kitchen at the Off Grid Log Cabin
- Safety Concern at the Off Grid Log Cabin in the Forest
- Log Cabin Sauna Build Ep 2 | It's a Dog's Life
- Mushroom HUNTING in the FOREST at the Off Grid LOG CABIN
- Axe, Deer and Fish | OFF GRID Log Cabin Life | Venison Heart Stew
- Baking Homemade Sourdough Bread in a Clay Oven in the Forest
- Bear Roast Stew | Rendering Fat | Maple Cutting Board | Corn Bread on the Woodstove
- What Happens at the Cabin, Stays at the Cabin
- Building a Log Cabin Alone in the Snow | Off Grid Sauna Ep 4
- Deer Meat Pie in a Primitive Clay Oven | What's with the Banjo?
- Self Reliance Food | Moroccan Goat | Cast Iron Cooking
- Can I Beat the Snow? | OFF GRID Log Cabin Sauna Ep8 | Canadian Wilderness
- What a Difference a Day Makes! | Off Grid Log Cabin Sauna Ep 9
- Leaning Right | OFF GRID Log Cabin Sauna Build Ep 10 | Canadian Wilderness
- Log Cabin Cost - Build a Debt Free Off Grid Tiny House | Home Tour
- Elk Steak on a Campfire | Show Us Your Steak
- Wood-Fired Sauna Stove and Kitchen Reno
- Log Cabin Sauna Ep 6 | Canadian Wilderness Off Grid Living
- Live Edge Wood Staircase in a Rustic Log Cabin | Working Alone
- Chainsaw Woodworking with the Cutest Dog on YouTube
- Cali's 2nd Birthday Celebration at the Cabin | Man's Best Friend
- What Would I Change About the Log Cabin? | Snowmobile Decision
- 1 MILLION SUBSCRIBERS Celebration with Joe Robinet and the guys at the Cabin