How to Heat an Off Grid Log Cabin with Wood, Thermal Imaging Scan (infrared)
Description
Testing the heat loss in my off grid log cabin, I use my infrared thermal imaging camera to take night time photos of the cabin while the wood stove is on, and then again the following morning when the fire is no longer burning. My woodburning stove is not the most efficient for primary heating, so I show exactly how it functions and what I can do to make it more efficient, saving wood and money in the process. It's interesting to see my dog, Cali the Golden Retriever, show up on the thermal image and how cool she is compared to the surrounding walls, table and bed that she's lying on.
The tiny house should be very easy to heat once the pointing (mortar) is done inside and out and I can use what I've learned on this log cabin to help me design and build the other structures on my wilderness homestead. Working and collecting firewood alone is challenging, so I want to maximize the efficiency of each building in order to make this long term off grid survival situation more economically feasible. If I can reduce the amount of fuel needed to heat each off grid building, I can provide all of the energy I need for free from the property. This is going to require the installation of rocket stove (rocket mass heater) to use the wood more efficiently.
I have a few upcoming diy projects that this thermal scan technology will help with - the bread oven, the sauna, the workshop and the maple sugar shack.
Links to Products Used:
Solar LED light bulb 15W
http://amzn.to/2BQvSQ2
Agawa Canyon Boreal 21 Saw
http://amzn.to/2BPV6OF
Copper Fairy lights
http://amzn.to/2BCmF0X
Solar String Lights
http://amzn.to/2DvgU2n
Banneton 12" round
http://amzn.to/2ByxwsF
Lodge Dutch Oven
http://amzn.to/2kHuxDQ
Flamen heat resistant gloves up to 500 degrees
http://amzn.to/2l1mRMm
Rocksheat baking stone
http://amzn.to/2kF6eql
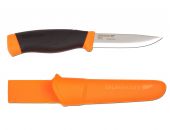
Mora Knife
http://amzn.to/2BOiv35
Lamp OiI
http://amzn.to/2qz0nZ1
Wall Lantern (candle lit)
http://amzn.to/2Dpa0MK
Moka Pot
http://amzn.to/2DEomvO Canada
http://amzn.to/2ndmtw6 USA
Canon 6D
http://amzn.to/2EdaZjs
DJI Mavic Pro
http://amzn.to/2DHuJib
Bragg's Sprinkle
http://amzn.to/2EdouzK
To see what I’m up to during the rest of the week, please follow me on my other online channels;
Website: http://myselfreliance.com/
Facebook – https://www.facebook.com/MySelfReliance/
Personal Facebook Page (Shawn James) – https://www.facebook.com/shawn.james.msr
Instagram – https://www.instagram.com/myselfreliance/
Mailing Address:
P.O. Box 20042
Barrie, Ontario
L4M 6E9
Canada
Tags: Self Reliance,off grid,log cabin,primitive technology,homestead,diy,alone,wilderness,survival,bushcraft,forest,wood,cabin,tiny home,maker,My Self Reliance,thermal scan,thermal imaging,heat,wood stove,woodburning,dog,how to,off grid cabin,heat loss,infrared,infrared camera,night photos,fire

Video Transcription
everybody Shawn James here from my self-reliance and welcome to the cabin excuse the red nose and the red face I just washed my face with some snow didn't realize there was some ice in there I kind of braided my nose and my cheek but anyway that's cabin life I'm actually heating up water right now on a stove to do the dishes and I wanted to talk about the stove answer some questions that people have had about especially about how I'm heating the place but also how efficient it is how warm it is inside when it's cold outside for example and things like that so here I am by the stove it's a medium temperature right now it's maybe -10 Celsius outside right now got down to minus 15 Celsius last night so I did something that I've been meaning to do for a while and that was to bring my infrared camera and scan the outside of the cabin while the fire was burning it was cold outside so that was really interesting to see the heat where I was losing heat where it was cold which areas of the cabin actually were not letting any heat him and which areas led to more heat than I thought so check out these photographs I think it's pretty cool one of the things I've learned is that wherever the moss is in the walls with no mortar over top from what no clay is actually more efficient or it's not conducting heat out so much as the sections about clay so this wall for example has moss on the inside only on the outside as mortar filling those joints but what's happening is the heats getting through and then it's collecting in that mortar and then that's transmitting as a heat spot as a hot spot so it is losing heat through there the spot over here where I actually have the inside and the outside mortar there's only a thin layer of moss in there wherever the gap was big enough to have Moss some places there's none and with the clay touching you can see that the heat is transmitting right through that now log cabins work in this different way than a traditional home because there's a lot more thermal mass these logs can heat up and hold the heat and then he can slowly release it so even though the fire died last night at probably 11 o'clock 11:30 by 6 o'clock in the morning the cabin was still comfortable it was cold but it was comfortable for sleeping had no way she's holding wake me up and cally was completely fine sleeping on her bed so a little bit cooler than if you're used to living in a traditional home where you just keep a furnace on and it comes on it keeps the temperature at 15 degrees Celsius or something I think but something you just get used to when you're living off-grid take a look at these thermal imaging photos from this morning the fire had gone out at that point so I thought I'm going to go outside and get some shots of the cabin with no heat without the fire started yet and see if there's much heat in the building and where is escaping if any and whether the stove and stove I'm still hot so check these photographs there there's pretty interesting I was surprised to see how closely they resembled the photos from the night before so the other questions around that or what am i heating with how much what am I going through and what's the deal with this wood stove so first of all I do have mostly hardwood on this property it's comprised mostly of sugar maple it's quite a few red maple there's yellow birch then the other tree like birch quite a bit of hemlock and balsam fir things like that but they're not really firewood so using those for building materials or just leaving them now this year I had to buy in firewood because I just didn't have time to cut while I bought the property in March and didn't get a chance to cut fire wouldn't have it seasoned so I've been cutting some trees that are dead standing and they've been great firewood but I just haven't got around to cutting any more of that so I had a whole load of logs dropped off so that's what I'm eating with but there it's local as well so it's all the same species so the question is how much what am I going through well when I'm here long term I'm burning probably an average of a log so what happens is that night I let it go out so there's some may be burning three logs over say six or seven hours at night but then during the day I have to put on at least one log per hour to get it up to temperature again so let's say my averaging 24 logs per day 24 pieces of firewood these are 16 inch pieces so that's 720 pieces of firewood that I need to keep the cabin at a comfortable temperature when I say comfortable I'm averaging probably 20 degrees Celsius so in terms of cords a cord of firewood is 4 feet high by 4 feet deep by 8 feet long and then typically they're cutting to 16 inch lengths so that 4 foot log that would make up the core is cut into three pieces 16 inches long so based on a 30-day month I'm using an average of 720 pieces of firewood so I'm essentially burning a Bush cork a month which is a lot so why is this stoves somewhat inefficient because people are going to probably be surprised at the amount of wood that I'm going through well there are more efficient ways to heat an off-grid home one of them is a rocket mass heater which I had planned originally for this cabin the very first cabin I started last spring for my friend I was actually planning to do a full heated clay bench rocket mass tile in that cabin which I may still do this year again if I get back to it this year if not I am planning to do that in at least one of the other outbuildings either the workshop likely the workshop and the sauna or something like that or or one of the other buildings so I probably shouldn't get all into that right now because I I need to show you the design I'm planning on using but check out the rocket mass heater or rocket stove on just google that if you want to know what that's about or just tune in later this year when I get around to that you'll see me build one up here at the Wilderness homestead I call it the cabin but I'm probably better off calling as a wilderness homestead because that's really what I'm doing here building the whole infrastructure to live here as a wilderness homestead not just building this cabin okay so back to the stove the stove is so that's one way to be more efficient use a rocket mass heater rocket stove and more efficient than this would be a an airtight stove with a with the glass and with more dapper control I'll show you what I mean careful stove is hot enough to burn you still or to make you uncomfortable are you doing okay so this stove as you see has a glass front as glass doors it's stove is cast and enamel coated it's made by Vermont castings and it's the encore model it's more decorative than efficient although it's big enough to heat probably 2,000 square foot home easily
if the woods in good condition of the woods dry it does have a fairly good sized firebox being horizontal rather than vertical but I can get three or four logs in that I can just place in this way it has these end irons in the front that hold logs from going out so from that perspective it's fine it it does hold enough firewood it does have a damper inside the back here just before it goes up the chimney instead it circles couple times inside and it burns more efficiently if burned some of the gases and some of that smoke some of the solids and the smoke and then that remaining goes up to chimney so it is more efficient so it's kind of rolling around and they're heating up the firebox instead of the chimney we're instead of setting the heat directly out now my wife and I bought this stove secondhand she found it on Kijiji four hundred and forty bucks so a great deal it was made in 1986 so these things do last a long time this damper here I don't know exactly 100 percent where it is but I'm pretty sure that's a fresh air return damper so in the back of the stove is a plate that if I remove that there's actually a duct that I could hook up to go directly outside if I put a hole in the wall ran it inside instead of this stove drawing air from under the door or from inside cabin and heating that up and setting up the chimney it would pull the fresh air in from directly outside and then cycle it without using up room air which is actually more efficient but it also creates a situation where you might not get enough air exchange in the building and we get to steel there and you want to avoid that now one of the things I don't particularly like about this stove is I'm used to having a wood stove that has dampers on the front and I like this spiral rot ones that you can turn on both doors or on a single door at one so I have no way of controlling how much air I'm feeding this thing unless I open the door or the handle broke off and this handles broken but I can do that that leaves a little space doors open maybe a half an inch so that gives it some air but what's unique about this stove again that's something I'm used to be used to having a fire bricks in the bottom you scoop it out this has a great inside this is how you clean it with the ash got a tray and that's tray so what happens when you open that there's a box in there so there it is fully lined so ashes aren't dropping on the ground if when I have that out we just drop into that box and I can clean that out but when I open that up and that damper the air rushes in here and then goes up the chimney
ready to fire start raging so that's the way I'm controlling this stove and like I said I don't think that's really proper but it doesn't work extremely well I just can't imagine they would design it that way so that you have to open that to pent it because no you have a little bit of a gap behind that pan so that I just can fall down behind the pan and forced me to have to reach in there and clean that out but it is extremely effective doing it that way so one of the reasons this stove is not as efficient as it could be is because of all those gaskets when you have a two doors like this that closed in the middle it's just like doors double doors entrance doors to a home they can't really seal because they're both operating be better if it was one door but what you have three all the spaces are all the moving parts inside in here on the door is this rope gasket now I don't know when and if that was ever changed by the previous owners but I haven't changed that so I really should pull the doors off and there's actually gaskets even inside in between the glass and the frame here I need to replace those or need to replace these gaskets there's a foam gasket here I need to replace that you're not a foam roll gasket and there's a insight and that damper there's a gasket as well so I really need to change all those to stop here from just free flow flowing into the stove when I want to dab it down at night so this here without that I wouldn't know what the temperature of the stove is or how its operating so I can tell by this thermometer whether I'm create have an efficient fire going or not so this surely should be in the burn zone I'm letting it die down right now isn't Cal your boat to head out but it should be in this burn zone and if it gets up to this area up here beyond 300 or 600 Fahrenheit you get into a temperature where you're at risk of creating a chimney fire because it creates so it builds up in there now when I'm down here what's happening is it's an inefficient burn and there's creosote building up inside because it's not burning off it's too much smoke going up that has particulates in it so it's starting to collect on that stovepipe so every day I want to have some fires that get up in this top range of the burn zone so that it burns out some of that creosote in the chimney the pipe really heats up and so does the top part here because the hot air collects up there you need to have this backstop here this is temporary I do plan on doing a clay one or you saw me bringing some copper in the last video or an upcoming video and that copper may go behind here had a really nice subscriber to the channel sent me that copper I gave it to me I went picked it up from him really really appreciate that so he thought I would use it for back here I still might do that but I so many other cool uses for it as well but you do need a barrier non-flammable barrier to stop this heat from heating up the wood and potentially starting a fire so that's it for this video I hope I answered your questions if not just leave a comment below and I'll try to get back to you as soon as possible don't forget to tune in on Fridays to watch me continue with the cabin build finish the interior and get to my outdoor projects and my other cabins that I'm building around the property so look forward to seeing you up here on Friday take care of a great week [Music]
About the Author
My Self Reliance
Shawn James Canadian outdoorsman, photographer, guide and self-reliance educator. Writer for Ontario Tourism. myselfreliance.com Outdoor adventures, including survival, bushcraft, canoeing, kayaking, hiking, snowshoeing, fishing and camping.
More articles from this author
- Alone on McGarvey Lake, Algonquin Park - solo canoe trip
- Bannock Recipe and Cooking Methods
- Bonnechere Lake, Algonquin Park
- Hambone Lake Canoeing
- Homemade Hot Tent Tipi for Winter Camping by Camper Christina
- How I Keep Bears Away From My Food - With Help From My Dog
- Killarney OSA Lake Solo Camping and Canoeing
- Stuffed Trout: Trail Food Recipe
- Purslane: Noxious Weed or Superfood?
- My solo cooking kit - Budget Camping
- Portaging a Canoe - More Tips for Easing the Pain!
- Limbing with a Gransfors Forest Axe - Safety
- Canoe Fishing - Trolling setup
- Three Ways I Make Coffee in the Woods
- Catch and Cook Fish 9 Ways: Walleye, Lake Trout & Northern Pike
- Sunrise on OSA Lake
- Bear in Camp How Did the Ursack Perform?
- Screaming banshee on trail camera
- Heading Out on George Lake
- Kelly Kettle - Trekker model - Lunch on Provoking Lake
- Morning on Catfish Lake, Algonquin Park - May 9, 2016
- How to Pluck and Cook a Wild Duck Gourmet Style
- Camping, Canoeing and Cooking with Shawn James and Joe Robinet
- First Day of Spring 2016 Sunrise
- Rod and Gun Lake, Algonquin Park
- Spring Canoe Fishing Trip Delayed Until May 6th
- Fox Family Spring 2016
- Dexter cattle for grass fed beef.
- Killarney solo canoe fishing trip picture slideshow
- Last Paddle of 2015 - Solo Paddle Strokes
- Track and Tower Trail, Algonquin Park
- Sunrise on the French River
- Solo Bushcraft Camp in Cold November Rain
- How to Duck Hunt Out of a Canoe
- My Self Reliance - Bushcraft, Canoeing, Hunting, Fishing and Homesteading
- How To Make Pine Tar and Charcoal From Fatwood
- Pog Lake, Algonquin Provincial Park - My favourite campground
- Calling and Tracking Moose During the Rut
- Swift Keewaydin 14 on Georgian Bay
- Installing a Privy at the Log Cabin
- Sweet and Savoury Bannock Cooked on a Campfire
- Build a Permanent Adirondack Shelter in 2 Days
- Kingfisher Lake, Algonquin Park - solo canoe trip
- Paddling Honey Harbour and Beausoleil Island, Georgian Bay
- Winter Bushcraft Camp & Snow Shelter with Shawn James & Joe Robinet
- Lawrence Lake, Algonquin Provincial Park
- The Hand-tools I Am Using to Build My Log Cabin and Choosing the Cabin Site
- Algonquin Park Solo Camping Trip Canoe, Burnt Island, Bear Lakes
- Fire, Fishing and Foraging
- Playing in the Waves with my Keewaydin 14 Canoe
- Bat Lake Hiking Trail, Algonquin Park - Winter Hiking
- Dressing for Late Season Cold Weather Deer Hunting
- The Paddles That I Use for Solo Canoeing
- Tim River falls at the Queer Lake portage, Algonquin Park
- Harness Lake, Algonquin Provincial Park
- Lemon Lake, Algonquin Park
- Canoe Camping in Canada in Autumn with Joe Robinet
- Campfire and Sunset on Burnt Island Lake
- Algonquin Park Longbow Lake - Solo Canoe Trip
- Shawn James and Joe Robinet Interview: Bushcraft and Winter Camping
- Traditional Canoe Camping on the North Channel of the French River
- What's in My Day Pack? My Solo Day-Tripping Gear
- Winter Camping and Bushcraft - Lake Water
- Log Cabin Build: Free and Cheap Materials
- Fishing the Oxtongue River in Algonquin Park
- Build a Cheap Log Cabin from the Ground Up
- Hunting, Fishing, Canoeing and Bushcraft with Shawn James, Joe Robinet, Doug Outside and Scrambled O
- Hiking the Kolapore Uplands - Metcalfe Crevice - wow, cool caves
- Paddling on the French River
- How to Build an Off Grid Log Cabin: For FREE!
- Kayaking Georgian Bay - Giant's Tomb
- Temporary Sleep System for Cold Weather Camping
- Smoke Lake - Bonnechere Lake - Cache Lake Loop: Algonquin Park Canoe Routes
- The Log Cabin: Clearing the Site and Preparing the Foundation Logs
- North Grace Lake, Algonquin Provincial Park
- Solo Camping on OSA Lake, Killarney Provincial Park
- Silver Peak, Killarney Provincial Park - Winter Ascent
- Homesteading: Farm to Table Poultry
- My Backcountry Canoe Fishing Rods
- Sunset on Smoke Lake, Algonquin Park
- Georgian Bay Camping and Sunset On Philip Edward Island
- Log Cabin Build: You Can Do This Too
- My Single-carry Portage System for Canoe Trips
- Algonquin PP May 2015 Canoe Trip Longer version
- Primitive Log Cabin in the Forest Alone in the Wilderness with Hand Tools
- Cabin Cookout: Breakfast Frittata
- Whiskey Jack Lake, Algonquin Park
- Cradle Lake, Algonquin Park - Clear blue water!
- Peanut Butter Energy Balls
- Build a Log Cabin with Fence Posts In My Backyard
- Couple's Ice Fishing in Northeastern Ontario
- An Evening Paddle in Collins Inlet, Georgian Bay
- Howling Wolves Wake Me Up at the Cabin
- Winter Bivy and Bushcraft Camp - How to Build a Winter Campfire
- Killarney Solo Canoe Trip Part 3 - The Bear
- Drilling a Lanyard Hole in a Ferro Rod
- Algonquin 2016 Solo Canoe Trip Day 5: Burntroot to Misty
- Cache Lake, Algonquin Provincial Park
- Kayaking Parry Sound Harbour Great beach campsites on Parry Island
- Lake Loiusa, Algonquin Park - Fishing destination
- Hiking Inglis Falls Conservation Area - Must return!
- Beaver on OSA Lake
- The French River - Parisien Island to Loon's Landing
- Algonquin Park Backcountry Canoe Fishing Tackle Box
- Meet My New Adventure Dog, Cali the Golden Retriever
- Log Cabin Update: Moving it to the Property, Making a Log Bench and Fireside Chat
- Cutting Down Huge Dead Trees at My Self Reliance Camp
- Cabin Cookout Sausage, Eggs and Steak Melt Sandwich
- Chaga Mushroom for Tea and Tinder
- South Canisbay Lake, Algonquin Park
- Channel Update and Wood Carving Tool Introduction
- Camping in Algonquin Park Little Trout Lake Solo Canoe Trip
- Algonquin Spring 2016 Canoe Trip Day 2: Grassy Bay to Catfish Lake?
- Misty Morning on Burnt Island
- Mohawk and Little Mohawk Lakes, Algonquin Park
- Killarney Late Season Hot Tent Canoe Trip - Rare experience!
- Close Encounter with a Mother Black Bear and Her Cubs
- Delano Lake, Algonquin Provincial Park - solo canoe trip
- Small Rivers and the Solo Canoe
- Killarney Solo Canoe Trip: Fantastic Fishing
- Campfire Deer Ribs, Grouse Hunting and Scouting For a Winter Campsite
- Ontario Fishing and Hunting Trip Trailer - Survival & Self Reliance Discussion
- Little Coon Lake, Algonquin Park - Solo canoe trip
- Make a Tripod Hoist and Move Logs While Building a Cabin Alone
- Bowhunting and Recipes for Deer
- Lost! My Gear for Surviving an Emergency Overnight Camp
- The French River - Camping on the South Channel
- Cooking Grouse on a Campfire
- COMING SEPTEMBER 2ND: No Permit Required: How to Buy Property For Your Log Cabin or Tiny Home
- Killarney Solo Canoe Trip June Part 2: Deer!
- Algonquin Park Solo 6 Day Canoe Fishing Trip May 2015
- My Canoe Camping Gear and Food for a 1-Night Canoe Camping Trip
- Plough Lake, Algonquin Park
- Head Lake & Head Creek, Algonquin Provincial Park
- Shawn James and Joe Robinet: Late October Camping Trip
- Hiking and "bushcraft" in the McCrae Lake Conservation Reserve
- Living off the Land at the Log Cabin
- Trailer for my Algonquin Park Spring Solo Canoe Fishing Trip 2016
- Grundy Lake Bear Cubs - Daytime visit
- First Paddle of 2016
- Log Cabin Building: Do I Plant Trees to Replace the Trees I Cut Down?
- Algonquin 2016 Solo Canoe Trip Day 4: Catfish to Burntroot
- Solo Winter Cold Camping and Bushcraft in Muskoka Ontario - My Self Reliance
- Cabin Cookout: Baked Beans on the Fire
- Sentimental on Pardee Lake, Algonquin Park - Nice campsite!
- Solo Winter Cold Camp and Bushcraft - Ramona Lake, Western Uplands Trail, Algonquin Park
- Algonquin 2016 Solo Canoe Trip Day 6: Misty Lake to Magnetawan Lake
- Whatnot Lake, Algonquin Park
- Bull moose in rut, Algonquin Park
- Shawn James and the Wooded Beardsman on Camping and The Wilderness Survival Challenge
- Breakfast on Remona Lake, Algonquin Park
- Algonquin Park Solo Canoe Trip Day 3: Burntroot to Catfish Lake
- Camping on an Island in Georgian Bay, Canada
- Algonquin Park Solo Canoe Trip Day 1: Magnetawan to Grassy Bay
- Coldwater River: Maiden Voyage - Swift Keewaydin 14 - Spring!
- Hilliard Lake, Algonquin Provincial Park
- No Permit Required! How to Buy Land for Your Log Cabin or Tiny Home
- Winter Camping with Tierney Angus: Bacon, Donuts, Mukluks, Toboggans and Hot Tent Tips
- Winter Camping: The Problem with My Latest Winter Campsite
- First Test Video With My New Canon EOS 80D DSLR Camera
- My Solo Winter Camping Gear
- Interview with Red Lake Outfitters: Woodland Caribou Provincial Park
- Solo Canoeing & Fly Casting Practice - Trip Preparation
- A Perfect Spring Day - Canoeing, Wildlife and Gear Prep
- Trout Fishing Gear for July Canoe Trip
- Notching & Splitting Logs, Cabin 2 and I Get Philosophical
- Pardee Lake, Algonquin Provincial Park - Fantastic!
- Canoeing & Kayaking the McCrae Lake Conservation Reserve
- 8 Day Fishing Trip in the Thunder Bay Region of the Canadian Wilderness
- Tim River, Algonquin Provincial Park - One of my favourites!
- Robinson Lake, Algonquin Provincial Park
- Silver Peak Winter Camping - Killarney
- Who is Shawn James and What is MySelfReliance.com?
- The Art of Shou Sugi Ban - How to Preserve Wood with Fire
- Point Grondine Park
- Log Cabin Construction: Log Gable Ends, Center Column and Ridge Pole
- How I Designed the Cabin and Positioned it in the Forest
- Living with a Blackbear at the Cabin in the Forest and Installing Windows
- Off Grid Cabin in the Forest: Raising the Roof and the Power of Inertia
- Fire Hardened Wood Roof on a Log Cabin in the Woods using Ancient Japanese technique Shou Sugi Ban
- Off Grid Cabin in the Forest - Eliminating debt and trimming loose ends
- Winter is Coming! Can I Finish the Log Cabin in Time? Roof, Stove and Outhouse
- The Man with the Axe: Archery, Cast Iron Cooking, Splitting Axe Review and Respect for Women
- Building a Log Cabin in the Forest with Help From My Dog - Roof, Stone Floor and Woodstove
- Building a Rustic Log Cabin: Wood Plank Flooring and the Cost of Early Retirement
- Insecurity at the Off Grid Cabin - Doors, Firewood and an Outhouse
- 6 Essential Tools for Building a Log Cabin: Don't Waste Your Money on This
- Books: The Craft of Log Cabin Building and One Man's Wilderness, Dick Proenneke
- Off Grid Cabin: A Visitor, a New Door and Wood Floor
- My Self Reflections: My 3 Month Rule for Managing Relationships
- Build a Log Cabin: Front Porch, Self Reliance and Survival, Generation Z
- Forging a Hewing Broad Axe with Shawn James and Toronto Blacksmith's Paul Krzyszkowski
- Building a Rustic Table for the Off Grid Log Cabin with Materials From the Forest
- TORNADO WARNING: Camping and Canoeing in Severe Weather in the Canadian Wilderness, RAW FOOTAGE
- Dressing for Extreme Cold Winter Weather at the Off Grid Cabin
- FREE Coffee Replacement From the Forest
- Man Builds Off Grid Log Cabin Alone in the Canadian Wilderness
- Giant Cheese Burger, Debt Free Living, Becoming More Self Reliant and Successful at the Log Cabin
- Log Cabin - Leatherbound Door and The Hole in the Floor?!
- Cooking at the Cabin: Cheese Fondue and Birthday Hike with My Wife and Dog
- Bushcraft Log Cabin Project, Cast Iron Cooking and I'm a Ramblin' Man
- Log Cabin TIMELAPSE Built By ONE MAN In The Forest (Real Life Minecraft)
- Golden Retriever vs Snake - Snake Strike, Funny Video
- Log Cabin: Primitive Clay Daub and Wood Fired Cast Iron Pizza
- Cooking Barbecue Venison and French Fries at the Log Cabin Outdoor Kitchen
- Off Grid Log Cabin: Alone with my Dog in an Ice Storm
- OFF GRID LOG CABIN with My WIFE and DOG, Catch and Cook TROUT
- Cabin Life Below Zero: Winter Camping and Ice Fishing
- The PERFECT BURGER on The Forest Kitchen Barbecue (BBQ) Grill
- Off Grid Cabin Life with My Dog: Rustic Kitchen for the Wilderness Homestead
- Q&A: How Does the Eco Fan on My Woodstove Work?
- Traditional Woodworking using Hand Tools: Finishing Interior of an Off Grid Log Cabin DIY Kitchen
- OFF GRID WATER at the LOG CABIN
- Off Grid Log Cabin in the Forest: DIY Rustic Wood Kitchen, Handmade Copper Sink
- How to Make & Install Floating Shelves in a Tiny House Rustic Kitchen, DIY Log Cabin, Macaroni
- Making Cedar Shakes for The Forest Kitchen Roof at the Off Grid Log Cabin
- Mortise & Tenon Sawhorses at the Log Cabin, Is This Really Off Grid Living?
- Bushcraft: Carving a Wooden Spoon and a Hooked Knife Handle at the Log Cabin
- Homestead Food, Hot Weather and Happy 4TH of JULY
- Long Term Food Storage for Self Reliance at the Off Grid Log Cabin
- Chimney Cleaning and Stone Hearth at the Log Cabin
- Felling a Huge Maple Tree with an Axe, Milling Lumber with Granberg Alaskan Chainsaw Mill, Husqvarna
- Home Alone with my Dog at the Log Cabin, ASMR Tapping Trees, Off Grid Refrigeration
- Tiny House Furniture, Gratitude, Perspective and Perseverance, Log Cabin Life, Braised Lamb Shanks
- Log Cabin Wilderness Homestead, Maple Syrup, Wild Edibles, Primitive Skills
- Venison Poutine at the Off Grid Log Cabin, The Simple Life
- Bushcraft Knife and Axe Safety, Working Safely Alone in the Forest, Log Cabin Life
- Off Grid Log Cabin in the Forest with my Golden Retriever Cali
- Fireplace Transformation, Cast Iron Cooking | Wilderness Survival Shelter
- Cordwood Kitchen Floor | Outdoor Kitchen | Off Grid Log Cabin
- NOT Alone with My Dog at the Log Cabin, Wild Edibles, Wild Life, Hugelkultur
- Solar Power Update | Dealing with Loneliness
- Wolves, Drought and Failed Raspberry Crop
- The Fall | Have You Seen the Ugly Orange Chairs Yet?
- FREE Hardwood Floor for the Outdoor Kitchen | Off Grid Log Cabin | Forest Kitchen
- The Building Site for the Log Cabin Bathhouse | Wilderness Sauna
- Raising the Roof | The Forest Kitchen | Off Grid Log Cabin Build, Ep.3 S1
- Cordwood Bear Claw, Homemade Cheese | The Forest Kitchen | Off Grid Log Cabin Build, Ep.8 S1
- Testing the Clay Oven | The Forest Kitchen | Earthen Oven
- The Log Cabin in the Forest Gets a Facelift, Cottage Life
- November Rain | Log Cabin Sauna Ep 7 | Canadian Wilderness Off Grid Living
- Cooking Outdoors at the Off Grid Log Cabin: Steak and Fries on the Campfire
- Table Made of Mud | The Forest Kitchen | Off Grid Log Cabin Build, Ep.9 S1
- Cali's New Winter Dog Boots for Snow and Ice
- Wooden Roof Shelter | The FOREST KITCHEN | Off Grid Log Cabin Build | Ep.11 S1
- DIY Stone BBQ Timelapse | Outdoor Kitchen
- I GOT HURT Building a PRIMITIVE KITCHEN in the Forest
- Timelapse Timber Frame by One Man in the Wilderness
- Barbecue (BBQ) Ham and Eggs | The Forest Kitchen | Off Grid Log Cabin Build, Ep.6 S1
- My Wild Life at the Log Cabin
- Solar Electricity for the Off Grid Log Cabin with Goal Zero Yeti Power Station
- Snowed Out at the Log Cabin in the Canadian Wilderness
- Rock and Roll Barbecue BBQ | The Forest Kitchen | Off Grid Log Cabin Build, Ep.5 S1
- Clay Pizza Oven Foundation | The Forest Kitchen | Off Grid Log Cabin Build, Ep.7 S1
- DIY Rocket Stove, Outdoor Kitchen, Golden Hour Life Hacks
- Off Grid Outdoor Kitchen at the Log Cabin, Why Build It?
- Lyme Disease, Tick, Mosquito and Fly Defence, Permethrin Clothing Treatment
- Wildlife at the Log Cabin, Off Grid Security
- Primitive Clay Mud Oven | The Forest Kitchen | Off Grid Log Cabin Build, Ep.10 S1
- Small Town Life: Learn to Fish, Hunt and Bushcraft, Shawn James Childhood
- Traditional Woodworking in the Forest with My Dog, Cali the Golden Retriever
- My Top 3 Axes for Bushcraft and Building a Log Cabin
- DIY Cedar Shingle Roof | Off Grid Log Cabin | The Forest Kitchen
- Timber Frame | The Forest Kitchen | Off Grid Log Cabin Build, Ep.1 S1
- Build a Stone Hearth for the Off Grid Log Cabin with My Dog | Woodstove Maintenance
- Q&A: Why I Wear Wide-Brimmed Hats
- Working Solo | The Forest Kitchen | Off Grid Log Cabin Build, Ep.2 S1
- She Digs It | The Forest Kitchen | Off Grid Log Cabin Build, Ep.4 S1
- I Have a Question for You
- The BEST Week of the Year!!! (at the Log Cabin)
- Winter is Coming! | Log Cabin Life
- Cooking Dinner With My Wife in the Forest Kitchen | Partridge | Blueberry Pie dessert
- Bushcraft Super Shelter Style Wood Shed | Deer Meat for Dinner BBQ
- Charred Wood Foundation | Shou Sugi Ban | Log Cabin Sauna Ep 5
- Wild Mushroom Pasta and Bone Marrow in The Forest Kitchen at the Off Grid Log Cabin
- Safety Concern at the Off Grid Log Cabin in the Forest
- Log Cabin Tools for the Off Grid Sauna Bathhouse
- Log Cabin Sauna Build Ep 2 | It's a Dog's Life
- Mushroom HUNTING in the FOREST at the Off Grid LOG CABIN
- Axe, Deer and Fish | OFF GRID Log Cabin Life | Venison Heart Stew
- Baking Homemade Sourdough Bread in a Clay Oven in the Forest
- Bear Roast Stew | Rendering Fat | Maple Cutting Board | Corn Bread on the Woodstove
- What Happens at the Cabin, Stays at the Cabin
- Building a Log Cabin Alone in the Snow | Off Grid Sauna Ep 4
- Deer Meat Pie in a Primitive Clay Oven | What's with the Banjo?
- Self Reliance Food | Moroccan Goat | Cast Iron Cooking
- Can I Beat the Snow? | OFF GRID Log Cabin Sauna Ep8 | Canadian Wilderness
- What a Difference a Day Makes! | Off Grid Log Cabin Sauna Ep 9
- Leaning Right | OFF GRID Log Cabin Sauna Build Ep 10 | Canadian Wilderness
- Log Cabin Cost - Build a Debt Free Off Grid Tiny House | Home Tour
- Elk Steak on a Campfire | Show Us Your Steak
- Wood-Fired Sauna Stove and Kitchen Reno
- Log Cabin Sauna Ep 6 | Canadian Wilderness Off Grid Living
- Live Edge Wood Staircase in a Rustic Log Cabin | Working Alone
- Chainsaw Woodworking with the Cutest Dog on YouTube
- Cali's 2nd Birthday Celebration at the Cabin | Man's Best Friend
- What Would I Change About the Log Cabin? | Snowmobile Decision
- 1 MILLION SUBSCRIBERS Celebration with Joe Robinet and the guys at the Cabin